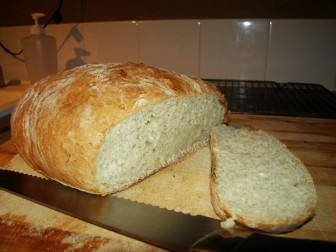
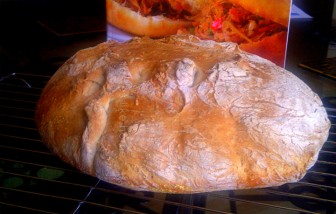
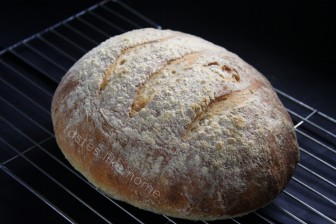
Hi Everyone, Back in 2007, I shared with you, what The New York Times’ Mark Bittman (aka The Minimalist) and Jim Lahey served up bread-loving folks the world over, No-Knead Bread. The No-Knead bread is a type of artisan bread that requires just 4 ingredients, no kneading, and a long, slow ferment. It is then baked in a very hot environment resulting in a crust that cracks, pops and shatters. The inside is hearty, meaty and full of large nooks and crannies for butter and jam to languish luxuriously. Oh that Jim Lahey bread is outstanding.
Now while that original No-Knead bread is excellent, the entire process is rather long, lasting from 16 to 18 hours depending on your location and temperature conditions. It requires special equipment, ideally a large cast iron pot with cover or ovenproof Pyrex glass or ceramic. Then there is a necessary preheating of the cooking vessel; it’s careful removal from the oven when it is time to add risen dough. Like I said, it’s a bit involved, but totally doable.
 But for those of you interested in making equally top-notch artisan bread in significantly less time, without special-type equipment; no preheating of cooking vessel and still no kneading involved, well then I think that you will like this adaptation from Artisan Bread in Five Minutes a Day: The Discovery that Revolutionizes Home Baking (TD Books 2007).
With this no-knead artisan bread, the initial ferment/rise takes just 2 hours at room temperature and I added an extra ingredient – sugar – to add more flavour and some moisture to the dough. And because this recipe uses a little more flour, it makes handling the dough – to shape it – easier. For baking, I recommend a baking sheet (18 x 13 inches). You can certainly use a large circular pan such as a pizza pan. Or, couple of loaf pans or a large 10-inch cake pan will do nicely too.

What I like about no-knead breads is that in many ways, it is a return to the basics of what bread making was all about – using a few simple ingredients to make something to feed the entire family. This type of bread also requires no special knowledge about baking. This recipe is so forgiving that even if you add more water and or flour, you will still come out with good tasting bread. It offers, I believe, for novice bakers and those not keen on kneading, the opportunity to make a loaf of bread to wow anyone and make their family proud.
And I firmly believe that once you make this bread, you will be armed with such confidence that you’ll be opting to bake your own bread. Master this basic recipe and then we’ll talk about altering and adding ingredients to give you different flavours and types of bread.
Listen, I had two very good friends who are not bakers – at all – make this bread with success. Professor Vibert Cambridge, an excellent cook who claims, “Baking and me don’t ‘gree…” made the bread and said, “This has been a confidence builder… I am happy to report that it is a success! Lovely texture… wonderful flavour and I am already confident to experiment with added flavours.”

Professor Harewood, who almost never cooks, wrote to say, “I made bread. Me. Susan Juanita Harewood made bread from scratch!”
Believe me, if they can do it, so can you.
Ready to give it a try?
Artisan No-Knead Bread
INGREDIENTS
3 ¼ cups all-purpose flour, plus extra for dusting
½ tablespoon salt
1 tablespoon sugar (brown or white)
1 tablespoon instant yeast
1 ½ to 1 ¾ cups warm water (110 – 115 degrees F)
Cornmeal for dusting
DIRECTIONS
1. Add the flour, salt, sugar and yeast to a large bowl and mix thoroughly.
2. Pour in 1 ½ cups water and stir to mix and form a wet dough. If you find that there is still flour in the bowl that has not been incorporated into the mass, then add the ¼ cup of water; mix together for 30 seconds.
3. Cover the bowl with plastic wrap and leave in a warm place to proof/rise for 2 hours or until doubled in size.

4. Line a large baking sheet (18 x 13”) with parchment paper and dust the parchment-lined baking sheet with cornmeal and set aside.
5. Generously dust a work surface with all-purpose flour.
6. Tilt the dough out of the bowl onto the floured work surface (use a rubber spatula or wooden spoon to help you get all the dough out of the bowl). Don’t worry, the dough will be very sticky and it will spread.
7. Flour your hands well and lift the dough from one side to the middle, on to itself; now do the same with the other half of the dough (flour your hands again if necessary). Now flip the dough over, seam-side down.
8. Lift the entire dough (or leave it on the work surface) and using your hands, tuck it in to form a large ball. Do not be afraid to dust your hands with more flour.
9. Once the ball has been formed, transfer it to the lined and dusted pan. Leave uncovered in a warm place to rise for 40 minutes.
10. After the first 20 minutes, preheat the oven to 450 degrees F with the rack in the middle.
11. At the 40-minute mark, transfer the risen dough to the oven and bake for 20 – 25 minutes. Check after 20 minutes and if the bread looks brown and the crust is solid, remove the pan with the bread from the oven and transfer the bread to a wire/cooling rack and let cool completely to room temperature before cutting.
NOTES
Use a large round pizza pan if you have. You can also use 2 regular loaf pans but in order to do so, you will need to cut the dough in half at stage # 7 and oil the pans well before adding the dough.
You might find that during the baking of the bread there is the smell of something being burnt, don’t worry; it is just the cornmeal getting dark.
Cynthia


