This week begins a 2-part series on eating a pig’s head.
A few weeks ago, a woman overheard me chatting with my butcher in the market about pig’s head and asked me what I was going to do with it. (I was pre-ordering it for pick up a couple of weeks later and wanted him to de-bone the head for me.) I told her that I was planning on making bacon and headcheese.
“You mean people eat the head of the pig?” she asked incredulously.
“What do you think happens to the head?” I asked.
“I figured that they throw it away,” she said.
As we waited for the butcher to prepare our respective orders, I explained to her some of the ways in which a pig’s head is cooked and eaten.

Have you ever eaten a pig’s head? Chances are, you have if you ever eaten souse made with parts of a pig, other than the trotters/feet. The tongue, ears, snout, and parts of the cheeks are usually included in pork souse. It is likely that you did not recognize those parts as they would be chopped into smaller pieces after being cooked and pickled.
A pig’s head is one of the cheapest cuts of meats you can buy, however, it produces some relatively expensive cured meats, such as pickled/salted snout (as in salt meat), bacon and a deli favourite – headcheese (we’ll get to why it is called “cheese” in part 2, next week). For centuries, people around the world, particularly those of the poor and working class have been eating nose to tail long before it became a trend. The process of curing and cooking various parts of a pig’s head really transforms the meat into delectable food. It is truly peasant cooking at its best – taking scraps, the odd bits, and turning them into scrumptious offerings.
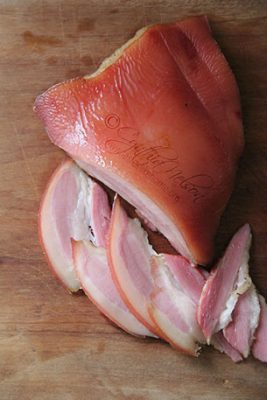
Bacon is made from various cuts of meat from a pig, the most popular being the belly from where we get streaky bacon – layers of alternating meat and fat. However, the cheeks (jowls) of a pig’s head make excellent bacon. I find it to be richer in taste, and that may be because the meat of the cheeks is worked more from chewing and also because it has a higher fat content. Fat means flavour. Whether wet or dry cured, the process for making belly bacon and jowl bacon is the same. The finishing process of turning the cured meat into bacon – roasting or smoking can further impact on the final flavour of the bacon.
Bacon in a week
If you like bacon and if you are up to a little kitchen experiment that will delight you and all your bacon-loving family and friends, then make some. You may never want to go back to store-bought bacon.
This column is about cooking a pig’s head, but you can certainly use the belly for this same recipe to make streaky bacon too. If making the jowl bacon, get your butcher to debone the head for you and remove the cheeks. Save the ears and the rest of the head for the headcheese you will make next week.
You do not need any special tools or equipment for this recipe but there is one specialty item you need – pink curing salt (the salt cure is coloured pink to differentiate it from regular white table salt). The pink curing salt contains sodium nitrite (so do not confuse it with Himalayan pink salt). The sodium nitrite is responsible for the bright pink of the meat when cured and helps give the bacony flavour. According to Michael Ruhlman, co-author of Charcuterie: The Craft of Salting, Smoking and Curing (W.W. Norton & Company, 2013), it needs to have the pink salt cure if you are planning to smoke the meat in the rare instance that botulism bacteria could grow; pink salt eliminates this possibility. On the other hand, if you do not want to use the pink curing salt, you can still make your bacon by cooking it in the oven. However, the meat will turn brown/grey when cooked and will taste, to quote Ruhlman, “pleasantly seasoned; porky rather than bacony”.
What do you say? Ready to give this a try?
Jowl Bacon
The measurement I am giving for salt below is for 3 pounds of meat, however, if you have more or less meat when you weigh, here is how to calculate how much salt you will need: multiply the weight of the meat in ounces or grams by .025 and that is how many ounces or grams of salt you should use. For this recipe, I use kosher salt.
If you are making bacon with more than 3 pounds of meat, then increase the other seasonings as well.
INGREDIENTS
1.22 ounces kosher salt (one point two-two ounces)
1½ teaspoons pink curing salt
1 tablespoon coarsely ground black pepper
1 teaspoon brown sugar
2 packed tablespoons of Guyanese fine thyme (fresh)
3 bay leaves, torn to small pieces
2 pig cheeks, rinsed and patted very dry
DIRECTIONS
Mix together the following in a small bowl: salt, curing salt, black pepper, sugar, thyme and bay leaves.
Rub both pieces of meat all over with the seasoning mixture; transfer the meat to a large zip top bag, be sure to get in all the seasonings remaining in the bowl or pan in which the meat was seasoned. Press the excess air out of the bag and seal. Place on a plate in the refrigerator and let it stay there for 7 full days. Each day, flip the parcel over for even seasoning.
On day 7, remove the parcel from the refrigerator and rinse off all the seasonings – do this under room temperature tap water. It is okay if some of the black pepper or thyme is still stuck on but try to get as much off. Pat the meat very dry.
Preheat the oven to 200 degrees F.
Get a sheet pan and place a cooling/wire rack in the sheet pan then rest the meat on top of the sheet pan.
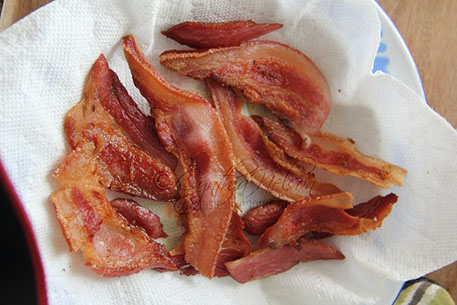
Add the pan with the meat to the oven and let cook for 90 minutes or until a meat thermometer registers 150 degrees F when inserted to the thickest part of the meat. Remove from the oven and let the meat cool completely (on the rack in pan) or until it comes to room temperature. You’ve waited long enough, cut a few slices and cook then wrap the rest tightly in plastic wrap followed by foil and refrigerate. When ready to use, slice and cook.
There! You’ve made bacon. As I have indicated, use this same recipe if you want to make belly bacon.
Next week, in part 2: Headcheese.
Cynthia
cynthia@tasteslikehome.org


