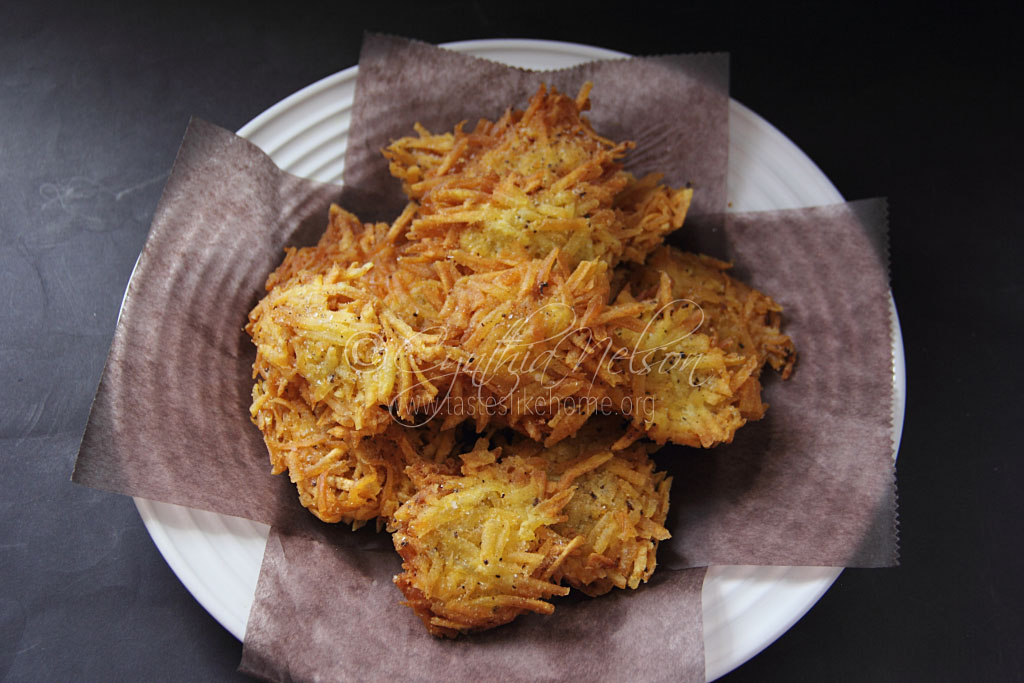
 In last week’s column I mentioned that among the things I make with green plantains is Arañitas. Several people wrote to ask more about it. Apart from that, I made some last weekend, shared with friends, and everyone wanted the recipe, so I thought that I would share with you how to make these crispy, crunchy plantain spiders as they are also known. On occasion they are also referred to as plantain cakes.
The origin of Arañitas lies in Puerto Rico, and as with so many dishes the world over, it was borne out of experiment, moments of what if, and making something different with what is available. I first wrote and shared with you about Arañitas over a decade ago in a column discussing other ways in which to fry plantains apart from crisps/chips or fries. The recipe I had gotten back then from a Puerto Rican Chef called for the shredded plantains to be soaked in salted water which would season the plantains. After the briny water bath, the plantains were wrung very dry in a tea towel. Two to 3 tablespoons of the plantains were pressed firmly together and shallow fried until lightly brown and crisp. They were absolutely delicious. However, since then I have changed up the way in which I make mine. Here’s why.
With the original recipe, I found that the crispiness did not last as long after the aranitas had cooled and been sitting for about a couple of hours. And that was because of the moisture in the plantains after soaking in the salt water. My primary attraction to Arañitas was for the crunch you get from thinly sliced fried green plantains, therefore, I wanted that effect to last longer. On another occasion, I decided to season the shredded plantains then fry them. That worked a little better in terms of staying crisp and crunchy, however, seasoning the plantains before frying meant that they stayed longer in the oil to cook and eventually get crisp. Again, the issue was moisture from the pre-seasoning. I didn’t like that. Here’s how I make my Arañitas.
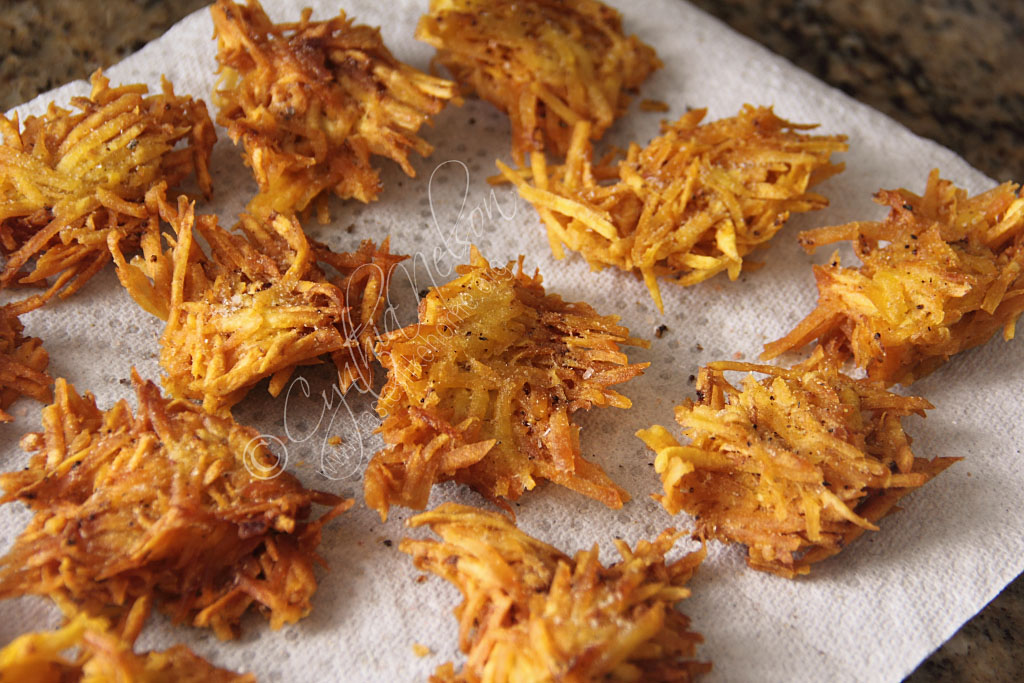
I shred the plantains, make them into little cakes/patties and fry them, then season them immediately as they come out of the frying pan. These Arañitas stay crisp and crunchy for 24 hours stored in an airtight container. I think they could say a day longer too, but they are so good that they won’t last. Every time you pass by the container, you will surrender your will to resist.
Arañitas can work as an accompaniment to any meal. They are excellent as appetisers and snacks. I mostly make mine for breakfast or dinner to have with a big cup of tea. They are good any day at any time. I eat mine as is but they can be served with your favourite cocktail sauce, aioli, ketchup, or sour.
Here’s how to make them and a few things of note.
● First, if you are making these for yourself, 1 or 2 green plantains would do but if you are making for family and friends, make nuff. Believe me, these things will go faster than you can make them. And people will often be asking you to make Arañitas.
● You want to get green plantains because they have the right amount of starch to hold together and cook and give the required crispiness and crunch.
● Be as creative as you like with the seasoning salt. I do a basic combination of salt and fresh ground black pepper. Garlic goes very well with fried green plantains so at times I would add garlic powder to the mix. On other occasions, I would add a little bit of ground cumin/jeera. You can also use your favourite dried seasoning that has salt. In Puerto Rico, they use Adobo seasoning.
● Now do not get this step wrong. Sprinkle on the seasoning as soon as you remove the Arañitas from the hot oil. This way, it will adhere, and fall into all the little nooks and crannies. Season to suit your taste.
● The thickness and size of the Arañitas are really up to you. Remember you are not making plantain chips so don’t make it thin. Grab about 3 tablespoons of the plantain and press it between your palms, that’s a good way to gauge the thickness.
● The shredded/grated plantains will be sticky, if you don’t want to use your bare hands, then work with food-safe gloves. The starchy-stickiness helps the plantain stay together and crisp up when cooked.
● Any Arañitas left over, store in an airtight container and use within 24 hours.
● Okay, here’s the “recipe”. I put the words in quotation marks because there isn’t much by way of a strict recipe.
INGREDIENTS
● Green plantains
● Salt and pepper to taste (or dried salt
seasoning of choice)
● Vegetable oil for shallow frying
DIRECTIONS
1. Line a wire rack with paper towels and set aside somewhere close to the stove. Prepare seasoning salt and set aside close by.
2. Heat the oil in a pan over medium heat. Meanwhile peel and grate/shred the plantains on the large-teeth side of a box grater. You want long strips so hold the plantains at an angle as you grate/shred.
3. Grab some of the plantains and press it firmly together between your hands then place in the heated oil. Repeat until there are several in the pan but do not over crowd it.
4. Let the plantains fry until golden and lightly brown, flip and cook the other side. Depending on the size and thickness, it should take between 2 to 3 minutes per side. Using a slotted spoon or spatula, remove from the pan shaking off the excess oil. Place on a lined rack and season immediately.
5. Let the oil come back up to temperature between each batch and repeat with the cooking.
6.Serve warm or at room temperature.
Enjoy!
Cynthia