 Most whole wheat breads are not made only of whole wheat flour. They contain some amount of white (all-purpose) flour, however little. The inclusion of all-purpose flour is two-fold – an improved texture in the finished product and the rise it gives to the bread when baked.
Based on regulatory standards set universally and in individual countries, breads are allowed to be marketed and sold as 100% whole wheat based on the ratio or quantity of the primary ingredient in the product, in this case, whole wheat flour. The same is true for many products sold as partly skimmed, low fat, no fat, light, sugar free etc. It is about how much is in and how much is out based on the premise of it being marketed as whole or healthy. Most, if not all of the time, if these products do not contain some of the things that are considered “bad” for us, they won’t taste good. We won’t find them appealing and we would not buy them.

The other fact is that they are needed to produce the outcome expected and needed for texture and flavour. Things get tricky when one of the so-called “bad” things gets taken out or reduced only to be replaced by more of another so-called “bad” thing. For example, the other day, I felt like having peanut butter with bread. In the supermarket was the regular peanut butter (I like the chunky variety) and next to it was the same brand labelled as natural with less salt. Fortunately, I do not have an issue with my sodium intake but I decided to have a look at the natural version, after all, we are all trying to eat better. Looking at the labels side by side, I saw that the salt in the natural peanut butter was reduced by 1 gram compared to the regular peanut butter. And to make up for the removal of the salt (a taste issue), 1 gram of sugar was added. It had a gram of sugar more than the regular peanut butter. I laughed and shook my head. I got the regular peanut butter. And you know the price for the natural peanut butter was more than that of the regular one right? More reason to laugh and choose the regular peanut butter.
If you have been reading me for some time, you will know that I don’t regularly eat bread. It is not a staple for me. I make bread often because I like making bread, bread rolls, and baking in general. Ninety-nine percent of the time, they are given away to friends and taste testers. It is strange though how our tastes change or are all over the place as we age and at various points in our lives. This past month I found myself wanting toast often. And get this, this is what I felt like eating for my main meal, accompanied by a salad and some meat protein. Anyhow, I figured that if I am going to eat it regularly (at least for now), that I should try to make it healthier by adding more fibre to the loaf. My go-to whole wheat loaf is usually a 3-part combination of whole wheat flour, multigrain flour and white all-purpose flour. I love this loaf that is two-thirds whole grains. But that third of white flour is needed to make it everything I want in a loaf.
The last time I made a loaf with all whole wheat flour, I had added boiled mashed sweet potatoes. It offered softness to the bread and natural sweetness. Lovely as it is, that bread takes time because you have to prep the sweet potatoes and let them cool completely and I do not always have sweet potatoes to hand. Grated coconuts, I always have in the freezer. I buy 3 to 4 dried coconuts at a time, grate them, and freeze them in 2-cup capacity. Whether to make milk, desserts, chutney, granola, breads or rolls, I always have grated coconut.
I have a recipe for coconut bread rolls that I make which is one of my favourites. Those rolls are tender and really nice. They are perfect for any type of filling or slice. Based on this combination, I wondered if the coconut would add the softness and moisture that is usually lacking in a pure whole wheat flour bread. Unconvinced that the coconut alone would do it. I decided to add roasted pureed pumpkin to the dough batter. Not an altogether good idea.
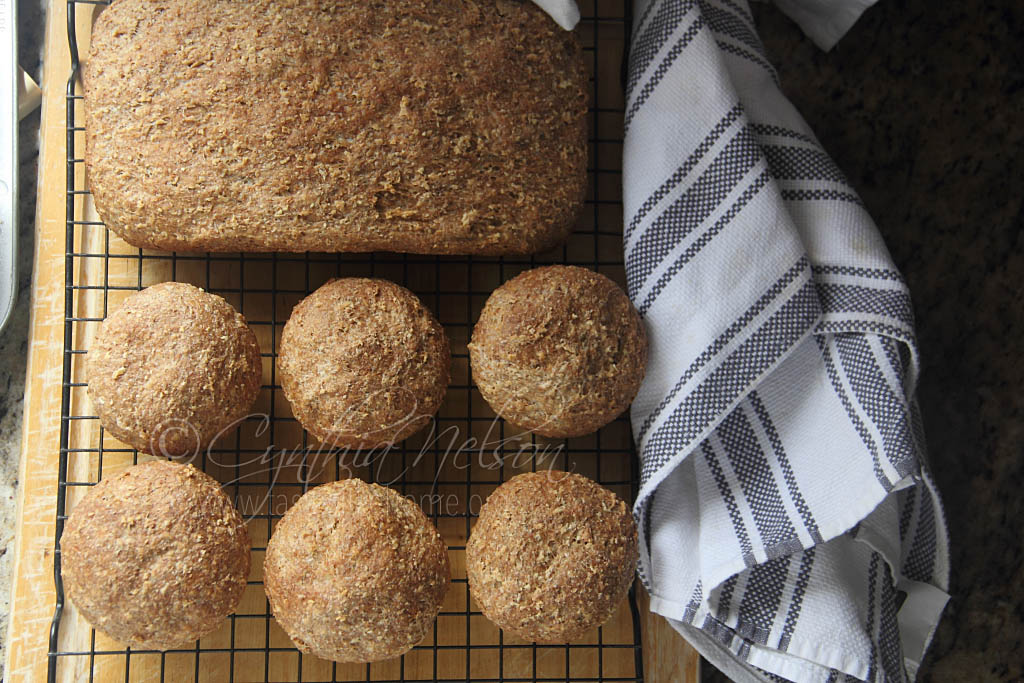
On the first try, I added too much of the puree so the dough was pasty and I ended up having to knead it with a dough scraper because it was sticking to my hands. The finished loaf and rolls I made were not the prettiest and they did not rise much (lack of gluten). However, they tasted really good, especially with cheese.
After assessing where I might have gone wrong the first time, I decided to put in less of the puree; the results were practically the same. Thank heavens for my taste testers. They eat my mistakes too. But I have to say, they loved the rolls and loaf. As I said above, the taste was lovely. Some mentioned having theirs with jam and eating the rolls with soup.
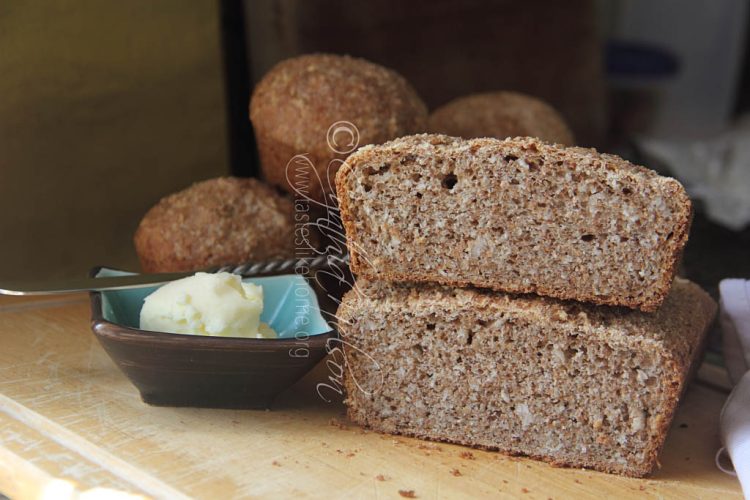
Determined not to give up, I ditched the pumpkin and decided it was going to be the whole wheat flour and coconut alone. The result is a good fibre-rich bread. While it rose well, it did not rise as much as a white loaf or my combo whole wheat loaf. Based on research, if I wanted it to rise as regular loaves, I would have needed to add gluten to the dough. Gluten is recommended for 100% whole wheat loaves to give it stretch and rise. And based on this, I can see why my whole wheat combo loaf always turns out well because a third of it is all-purpose flour which adds gluten.
Most people don’t have vital wheat gluten readily available (I don’t). I have never used it. However, if you have access to it, you can add it to this loaf. Personally, I am not looking for more than what I got with this loaf. It is soft and nutritious; that’s what I wanted.
If you’re looking for a healthier loaf or roll with added fibre, give this a try and let me know what you think.
Cynthia
Whole Wheat Loaf with Coconut
Yield: 1 loaf or 10 rolls
INGREDIENTS
● 1 pound whole wheat flour, plus extra for work surface
● 1 tablespoon brown sugar
● 1 ½ teaspoons instant yeast
● 1 ¼ teaspoon salt
● 2 cups fresh grated coconut
● Warm whole milk (110 – 115 degrees F)
● Oil for bowl & rubbing dough
DIRECTIONS
1. Mix together the flour, sugar, yeast and salt then stir in the
coconut.
2. Add enough milk to form a dough and knead for 15 minutes
(in the bowl or on a floured work surface).
3. Rub bowl and dough with oil, cover, place some place warm
and let rest for 2 hours
or until dough has more than doubled in size.
4. Brush a 9 x 4 pan with oil and set aside. Or if making rolls, line
a baking sheet with parchment paper.
5. Punch down risen dough, flattening it to release air/gas and
roll dough from one end to the other, pinching the end to the
rolled log to secure. Place the dough seam- side down in the
pan. If making rolls, divide equally into 10 pieces and roll into
balls (do not flatten the tops). Place on a lined baking sheet.
Cover and let rise for 40 minutes.
6. After 20 minutes into the rise, preheat the oven to 350
degrees F.
7. Bake bread/rolls for 30 to 35 minutes or until the bottom
when tapped sounds hollow. Remove from the oven, let rest
for 8 minutes then transfer from pan to cooling rack and let
cool to room temperature before cutting and using.


